When I wanted to test building my AWS C++ code for Windows, I thought I’d save some time and energy by using Amazon’s pre-built sdk binaries. Following the official documentation, I used NuGet to add the dependencies. When building my project, though, although compilation succeeded, I got link errors like this:
Error LNK2019 unresolved external symbol "__declspec(dllimport) void __cdecl Aws::InitAPI(struct Aws::SDKOptions const &)" (__imp_?InitAPI@Aws@@YAXAEBUSDKOptions@1@@Z)
Here’s the workaround I used:
I realized that by default, Visual Studio 2019 builds for msvc “v142”. But the NuGet binaries are at the latest msvc “v141”, associated with Visual Studio 2017.
(I’ve been using Visual Studio 2019 Community, I’m glad that Microsoft provides this fully-powered free version to the community).
First, create a C++ console app project,
Go to the Tools menu, Tools -> NuGet Package Manager -> Manage NuGetPackages for Solution...
Click the Browse tab in the upper left.
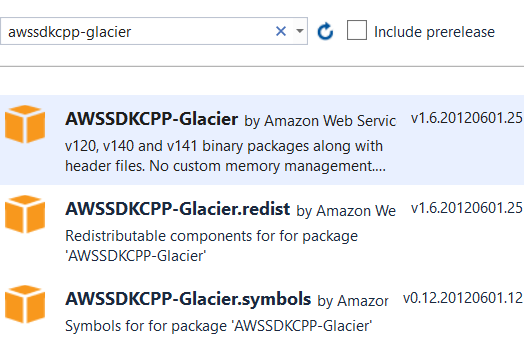
Type “awssdkcpp” into the Search box. In my case, I wanted the “awssdkcpp-glacier” package. I selected AWSSDKCPP-Glacier (which will automatically get its dependencies, don’t worry about getting the “redist”, “symbols”, or “core”).
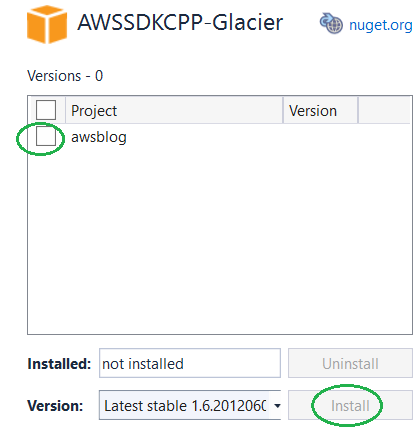
In the box to the right, I checked my project, then clicked Install.
I then entered my C++ code. A bare-bones example to see if it can build:
#include <aws/core/Aws.h>
#include <iostream>
int main()
{
    Aws::SDKOptions options;
    Aws::InitAPI(options);
    {
        std::cout << "hello";
    }
    Aws::ShutdownAPI(options);
}
I right-clicked the project and opened Properties, and saw this:
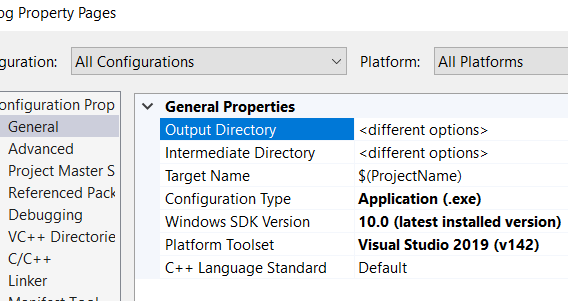
I selected All Configurations and All Platforms at the top, then I clicked General in the list on the left. I changed the Platform Toolset to v141 and clicked OK.
I still saw link errors, so I went back to the same properties page, and chose an older Windows SDK Version from the list. Even use Windows 8.1 if the Windows 10 options don’t work.
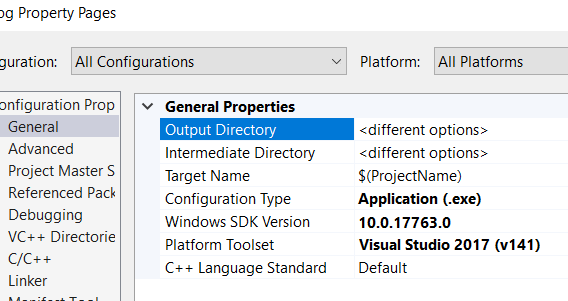
When I used v141 and 10.0.17763, everything built and and linked correctly!
Further troubleshooting
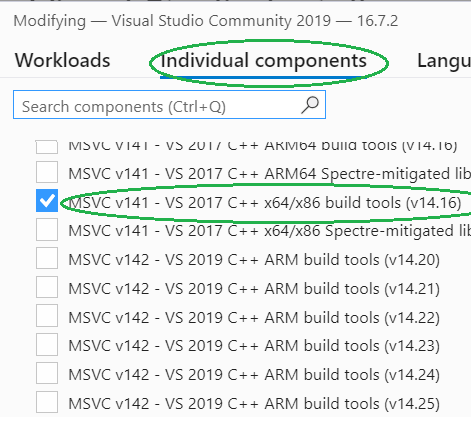
If v141 isn’t in the list, or if none of the Windows SDK versions work, you can add them to visual studio by doing the following:
Open Programs and Features in the control panel, where you would normally uninstall a program:
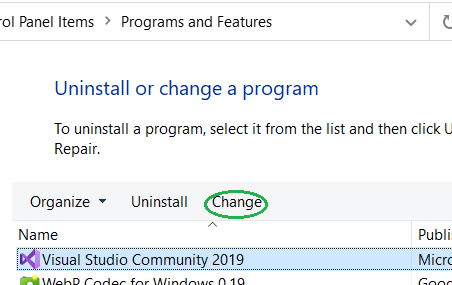
Find Visual Studio, select it, and click Change.
Choose the Individual Components tab, and under Compilers, build tools, and runtimes, check MSVC v141.
If the choice of Windows SDK wasn’t working, scroll to the very bottom, under SDKs, libraries, and frameworks and check one or more earlier SDKs.
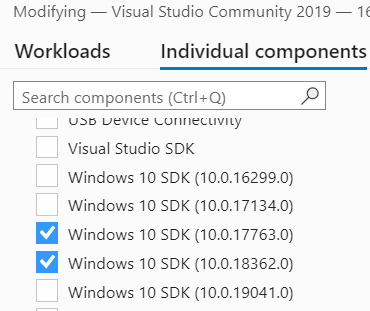
Click Install in the bottom right. It could take up to an hour for the updates to be downloaded and installed. Then re-try the steps in this article.